- What are the best dimensions for Product images?
- What are the best dimensions for Category banner, hero, slider, and background images?
- File format: why JPEG is the best friend. When & how are the WebP images used on Shopify?
- The actual image size vs. HTML container size
- Shopify image compression and optimization
- Conclusion
The best Shopify sites have one thing in common: beautiful product photos. They load the right image size for the right situation and load fast.
The image sizes for your store will vary depending on the Shopify theme you use. Here we will give some recommended image dimensions that are best for Desktop and mobile screens while keeping your store loading fast.
In this article:
- Recommended dimensions for Shopify product images
- Recommended dimensions for Shopify category banner, hero, and slideshow images
- File format: why JPEG is the best friend. When & how is WebP used on Shopify?
- The actual image size vs. HTML container size
- Shopify image compression and optimization
Let’s get started.
What are the best dimensions for Product images?
A general guideline from Shopify:
- Maximum image dimension: 4472 x 4472 px or 20 megapixels
- Maximum image file size: 20MB
- Recommended square product images: 2048 x 2048 px
- Recommended minimum product images for zoom functionality: 800 x 800px
- Recommended Image Formats: .png, .jpeg, and .gif
Best practice:
For most products, we recommend a square (1:1) image ratio and up to 2048 x 2048 px - the best dimension for mobile screens as they stack on the screen uniformly without the need to pinch or zoom.
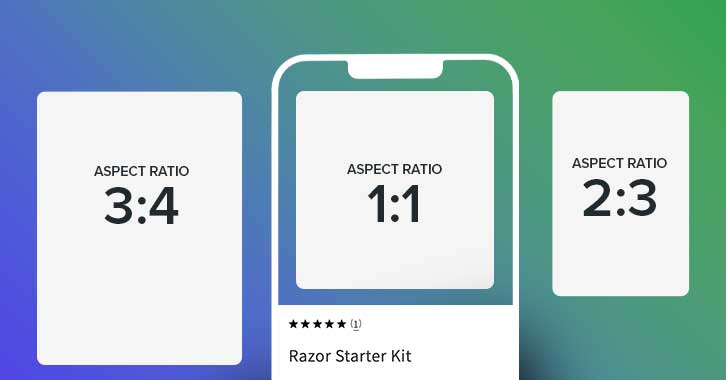
Recommended dimensions for Shopify product images
For example, the image could be 800 x 800 px or 2048 x 2048 px, the aspect ratio would still be 1:1.
If a square image does not fit well with your product shape, another alternative dimension we recommend is a portrait (3:4 or 2:3). For example, a portrait image with a ratio of 2:3 could be 1500 x 2250 px (The height is 1.5 times longer than the width).
Please note, your product image should be at most 300kb.
What are the best dimensions for Category banner, hero, slider, and background images?
A general guideline from Shopify:
- Max background image width x height: 2500 x 1406 px
- Max background image size: 20 MB
- Aspect ratio: 16:9
- Max hero image width: between 1280 and 2500 px
- Max hero image height: between 720 and 900 px
- Max hero image size: 10 MB
- Aspect ratio: 16:9
Best practice:
The most popular screen has a 16:9 aspect ratio, so we recommend using this aspect ratio for hero, slideshow, and collection banners.
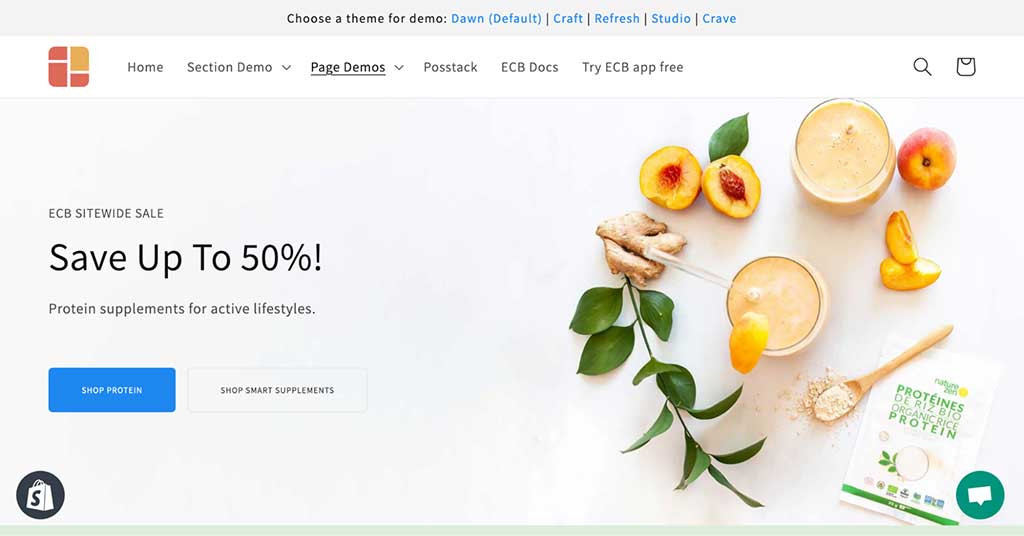
A 16:9 hero image on an Easy Content Builder landing page
For Hero banners and slideshow images, it's important to ensure all key information (CTAs, etc.) is visible above-the-fold. The dimensions should be between 1200 and 2000 px wide and between 400 - 600 px tall.
For collection page banners, you can decide how much the banner height takes (in general, you can choose the shorter height compared to the hero banners).
For background images, it's safe to go with the most popular aspect ratio 1920 x 1080 px.
Tip: You can easily design unique hero sections for your Shopify homepage, landing page, or any custom page using the Easy Content Builder. Watch this video to discover how you can mix different elements to improve the visual impact of your hero section.
File format: why JPEG is the best friend. When & how are the WebP images used on Shopify?
Shopify now supports JPG, PNG, GIF, and WebP on supported browsers. Choosing the right image formats will really help you reduce loading speed without sacrificing quality.
- JPG is the most used format that presents your image in decent quality with a wide color range at the smallest file sizes. We recommend JPG for Shopify product images, hero and slideshow banners, blog post images.
- PNG: offers a higher quality lossless compression but with a larger file size than JPGs. This format is more suitable for logos and icons.
- GIF: is a better fit for 360-degree shots.
Now you know why the JPG file format is best for your Shopify store.
WebP - automatically generated by Shopify:
WebP - a modern image format developed by Google - is known to reduce your image file size by over 30% compared with PNG and JPEG.
Shopify automatically serves WebP images for JPG and PNG image files when it detects a buyer web browser that supports WebP format. GIFs are automatically converted to animated WebP too. You do not need to prepare the WebP files yourself (Shopify even does not allow you to upload this file format).
Browse this Shopify template on Chrome and save one of the images from the Image With Text section, you will get a WebP image
Tips: Besides common JPG and PNG, you can use SVG file format when using Easy Content Builder - a handy way to use smaller image file sizes.
The actual image size vs. HTML container size
Why should you resize your image for the HTML container? Every image on your Shopify page is in an HTML container that controls how the image displays in relation to other content on your page.
So an effective way to optimize your image is to resize the actual image to match the container's shape before you upload it to your site. This also helps to minimize or prevent cropping issues.
How to find the HTML container size?
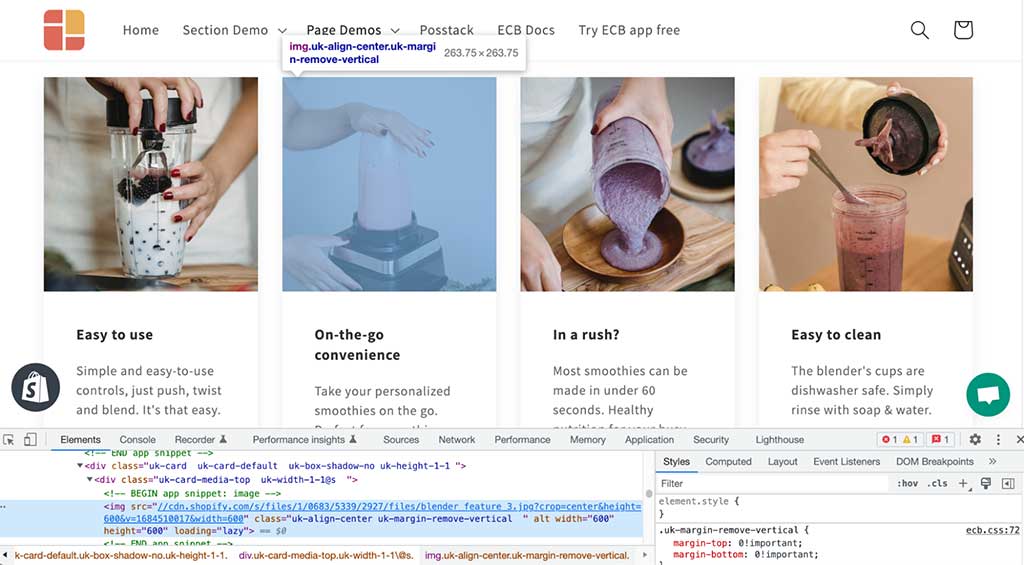
You just need to access your web browser’s Developer tools. Right-click (Windows) or Ctrl-click (Mac) on an image and select “Inspect Element” to open Developer Tools. On the inspection panel, you should see the pixel dimension of the container.
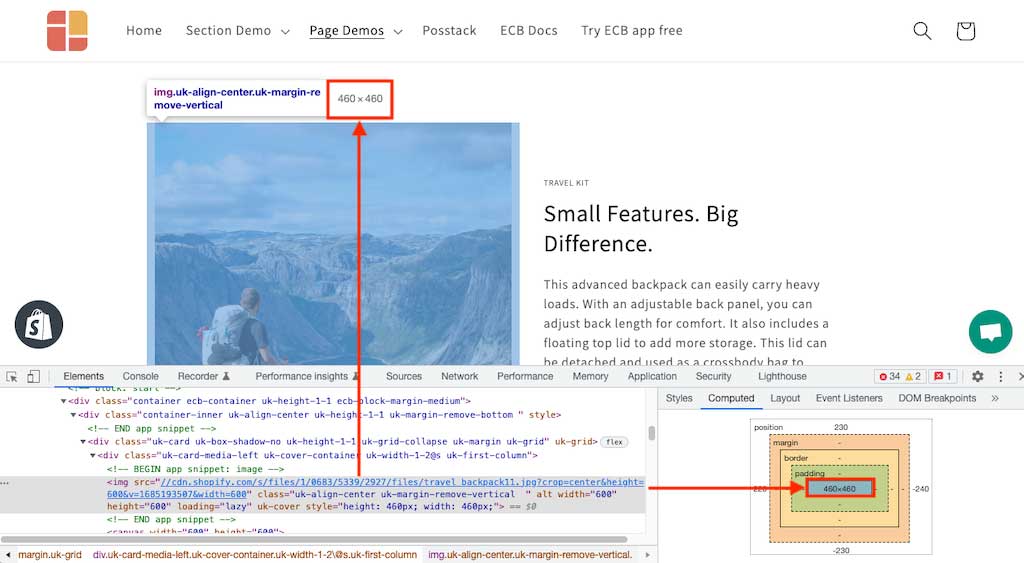
An example of Developer Tools on Chrome browser
Tips: To ensure an image looks good on a retina screen, you can resize your images 1.5 times larger than the actual HTML container dimension.
Shopify image compression and optimization
As you might know, Shopify's 'magic' image serving technology automatically compresses images when they're displayed in your store. Compressing an image is to resize the file size for faster page loading.
In addition, Shopify also automatically converts your PNG or JPG into WebP format when it detects a user browser that supports this modern file format.
In spite of Shopify's optimization, the compression itself is based on the original size and quality of your image source files. So it's always crucial to optimize and resize your image before uploading it to your Shopify store. You can search numerous compression tools to help you with the optimization.
Here are a few handy tools for you to start with:
- Free tool by Shopify to resize images: Shopify's free image resizer
- Enter your image dimensions to calculate how many megapixels that is: https://toolstud.io/photo/megapixel.php
- https://tiny-img.com
Conclusion
Creating high-quality images and optimizing images are complex. However, by leveraging the right tools, you can get different kinds of images on your Shopify store done right - product images, hero, slideshow banners, or blog images.
Additionally, there are plenty of advantages to using a content builder tool like Easy Content Builder. It houses built-in configurations that lets you specify custom image dimensions in relation to other content blocks. Once you upload compatible images, they will be optimized and served via Shopify CDN - content delivery network (cdn.shopify.com). Easy Content Builder makes adding images to your Shopify store even easier just through your theme editor.
