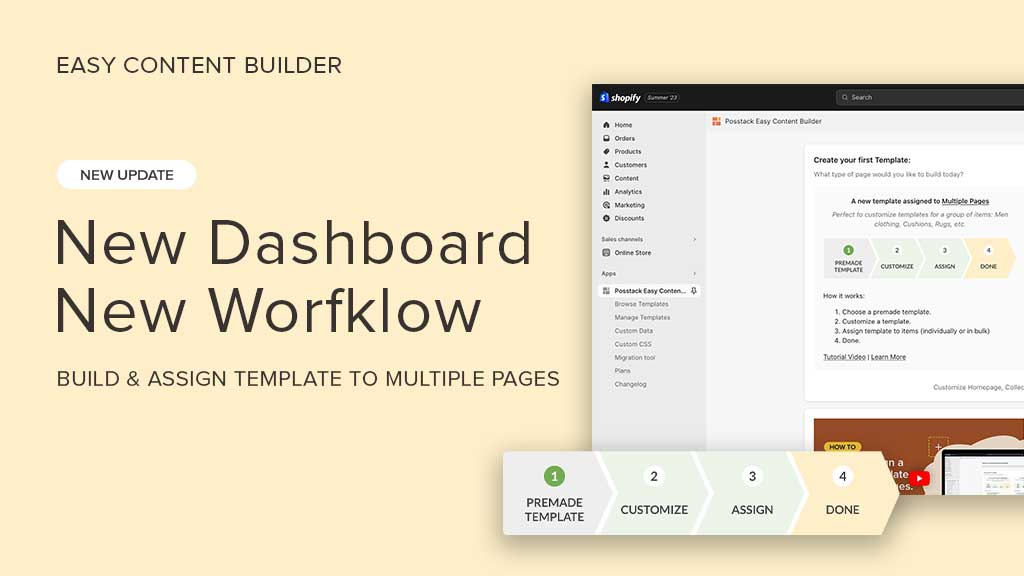
We are incredibly excited to introduce to you an entirely new dashboard of the Posstack Easy Content Builder. This update includes a new workflow to create custom templates and assign them to multiple pages at once.
Let's take a look at these new essential updates.
Revamped app dashboard
If you've worked with our Easy Content Builder before, you'll notice a new revamped app dashboard compared to the old version.

Now, you have two ways to create your custom templates using Easy Content Builder:
- Create a custom template and assign it to multiple pages - individually or in bulk.

- Create a custom template and assign it to one page.

The first option, which we just released a few days ago, is to create a new template that can be assigned to multiple pages at once. We recommend you get started with this option if you plan to build a template for a group of pages like Men clothing, Cushions, Rugs, etc.
The second option is to create a new template that can be assigned to an individual page. This option is perfect for building a unique landing page for a new product, About Us, lookbook page, etc.
With the two workflows in place, you gain a lot more flexibility in creating custom templates for any pages on your Shopify store, from the homepage, collection pages, and product pages to landing pages. Creating and assigning a template is straightforward and easy to follow. If you’re new to the app, you can check out the step-by-step video guides on the dashboard.
New workflow - Create & assign a template to multiple pages
Imagine that the seasonal sale events Black Friday and Xmas are approaching, and you plan to sell an exclusive collection of paintings as a gift offering - all the products in this collection will share the same design style with promotional sections. What’s the easy way to create this type of product page?
If that’s something you cope with, Easy Content Builder enables you to set up that custom template and then assign it to all products within the same ‘exclusive collection’ in a quick and easy manner.
Here’s how it works:
- Step 1: From the Easy Content Builder dashboard, click on Browse Templates. Here, you will see all premade templates that Easy Content Builder provides.
Good to know: Templates are a collection of sections pre-built by Easy Content Builder. Once you add a template to your theme, you can update your images and copy to fit your brand. Then, edit, reorder, or remove any section within that template to create your ideal page.
- Step 2: Select a premade template to start with and click on Choose Template. Or you can start with a blank page if you want to create everything from scratch.
- Step 3: Then, specify the template type - in this example, Product, and enter the template name, for instance, xmas_gift. Then, hit Submit.
- Step 4: And it’s going to open up your theme editor. Here, you can start customizing the template to fit your needs.
Just a side note, Easy Content Builder automatically populates the template on a sample product, so you can freely customize the template and assign the template to any pages you specify later on.
- Step 5: Assign the template to an individual or multiple products using the Bulk Editor.
We made a tutorial video that walks you through all 5 steps above, you can check it out below:
In addition, you can also take a look at our newly updated documentation. It covers anything from your first steps to the more advanced customization.
Conclusion
Easy Content Builder's new app dashboard and workflow make building and applying a template to any page much easier and faster. This way, you can save time by assigning a template in bulk instead of on an individual page.
Have you tried out the new Easy Content Builder yet? Let us know what you think of the new workflow in the comments below.